A fleet is built on 14 points. A strong ship takes the room of two weak ones, so the line-up is the first decision of the battle — before a single shot.
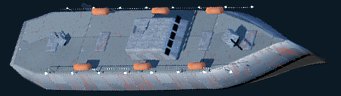
Patrol Boat
Fleet points: 1 · sections: 2 · armour: 1
One fleet point. Taken to fill a gap and stretch the formation.
A trade piece. One torpedo sinks it, but it fills a slot and soaks shots meant for something bigger. Put them on the flanks: every turn spent on a boat is a turn your battleship survives.
Armament: Deck Gun
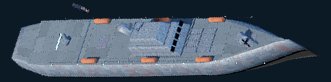
Frigate
Fleet points: 2 · sections: 3 · armour: 2
The early-fleet backbone: the mortar reaches past hulls and the armor takes a couple of hits.
Two points for a hull that lasts and a mortar that lobs over cover — the only cheap way to reach a ship behind smoke. Keep it in the second line: the mortar needs no line of sight and armor 2 survives a couple of hits.
Armament: Deck Gun, Mortar
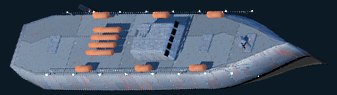
Missile Boat
Fleet points: 2 · sections: 2 · armour: 1
Homing missiles for two points. Dies to the first hit.
The missile corrects itself in flight, making this the most accurate weapon two points can buy. The price is armor 1 across two sections: any hit is fatal. Keep it behind bigger hulls.
Armament: Guided Missile

Destroyer
Fleet points: 3 · sections: 3 · armour: 2
Two torpedoes for a big target, an autocannon for everything small.
Two torpedoes are two dead boats or half a cruiser, and after that only the autocannon is left. Spend them on big targets: resupply will not bring them back quickly.
Armament: Autocannon, Torpedo
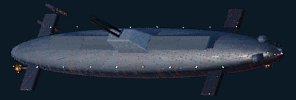
Submarine
Fleet points: 3 · sections: 3 · armour: 1
Invisible until it fires. Only depth charges can find it.
Invisible until it fires, and area weapons cannot flush it out. Three torpedoes at four damage is the densest firepower three points can buy. It has exactly one counter: a minelayer's depth charges.
Armament: Torpedo

Minelayer
Fleet points: 3 · sections: 3 · armour: 2
Two mines on the approaches and depth charges against submarines.
The only class that answers a submarine: depth charges do double damage to anything submerged. Its two mines sit on the approaches and detonate incoming torpedoes before they reach your line.
Armament: Deck Gun, Depth Charge

Cruiser
Fleet points: 4 · sections: 4 · armour: 3
An all-rounder: main battery against armor, rockets against formations.
Nine main-battery rounds defeat any armor and the rocket salvo covers an area. An all-rounder equally useful against a battleship and against a swarm — a good ship to build a fleet around.
Armament: Main Battery, Rocket Salvo
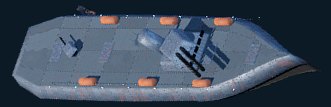
Monitor
Fleet points: 4 · sections: 3 · armour: 4
Armor 4: small guns simply bounce off.
Armor 4 means deck guns and autocannons are useless against it: their damage 1 chips a quarter of a section. Put it in the front line — it costs the enemy twice the shots any other ship does.
Armament: Main Battery, Mortar

Drone Tender
Fleet points: 4 · sections: 3 · armour: 2
Three drones: scouting the enemy layout and striking the full depth of the board.
A drone outranges every shell and lifts the fog as it goes — it is reconnaissance as much as damage. Three per battle, never replenished. Take it when you need to find a submarine or open up the far corner.
Armament: Autocannon, Surface Drone

Battleship
Fleet points: 5 · sections: 5 · armour: 4
Twelve rounds and a railgun. The thickest armor after the monitor.
Five points, half the fleet budget, and in return twelve rounds plus a railgun that punches clean through. The longest-lasting gun platform in the game. The catch: five sections make a large target with nowhere to hide.
Armament: Main Battery, Railgun
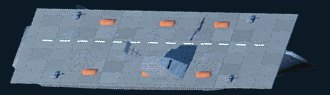
Carrier
Fleet points: 5 · sections: 5 · armour: 3
Two airstrikes reach anywhere, ignoring range entirely.
Airstrikes ignore range entirely and reach the far corner no shell can. Two sorties a battle and they never come back, so hold them until you have found a cluster worth hitting.
Armament: Autocannon, Airstrike